
When we launched AutoBuy in October 2022, it was the first of its kind. Easy to configure checkout automation, on the go, for everyone on both iOS and Android. Powered by our extremely powerful (and fast) retail monitoring network. A year later, we’re still way ahead of any competition.
Haven’t tried it yet? You don’t know what you’re missing! (If I do say so myself). In this post we’ll give it a test drive. You can follow along with a free trial! Let’s get started.
Get the App
First, you’ll need the app. Tap your app store below to get it installed.


Get an Account
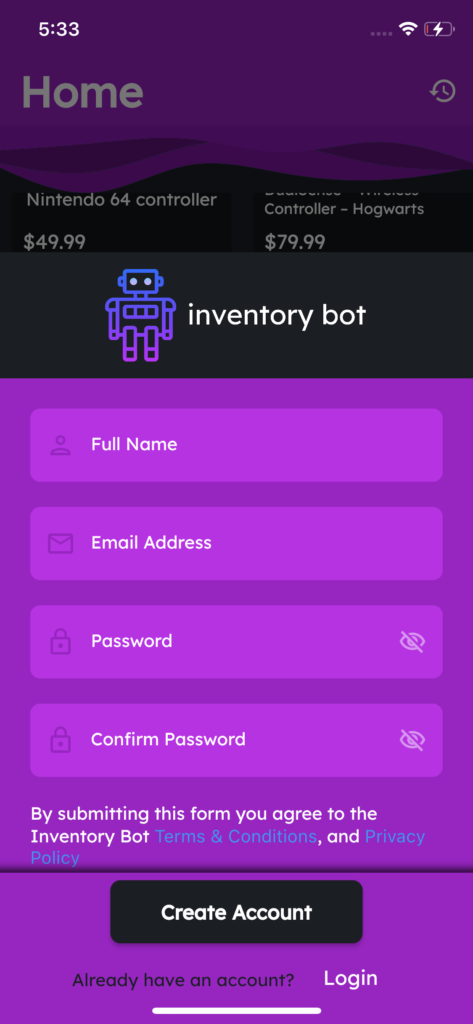
Next, you’ll need an account. Tap “Sign Up” on the homepage, fill out your email and password, and we’re off.
Also make sure you accept the Notifications permission when asked!
Get Your Free Trial
Next up is a Subscription. Tap “Get a Subscription” on the homepage, choose the AutoBuy option, and submit. It will give you the confirmation prompt for your App Store, presenting any Free Trial that might be available (we have it enabled, but eligibility varies, and is controlled by the App Stores).

AutoBuy Setup
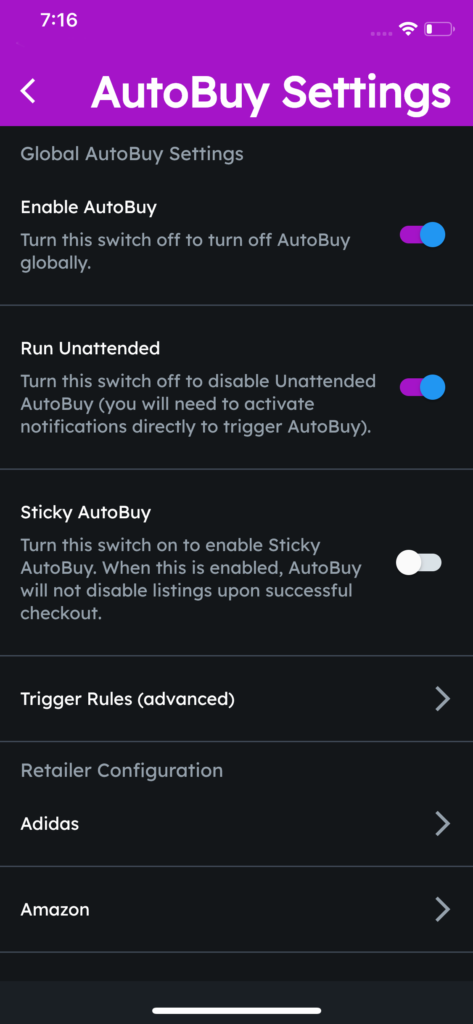
Next, let’s get a retailer set up. Head to the Settings tab and tap “Edit AutoBuy Settings”. Turn on “Enable AutoBuy” and “Run Unattended”. If you decide not to enable Run Unattended, you’ll always need to activate the notifications in order to kick off AutoBuy, even if the app is running. When running in Unattended mode the app will only be able to trigger AutoBuy while it is running in the foreground.
Recommended Setup
The device you use to run AutoBuy makes a big difference in how well it will perform. You’ll want to maximize each of the following to have the best chance of success:
- Keep your device plugged in and unlocked
- Configure your device settings to prevent the screen from turning off while plugged in. If the device locks, the app will no longer be running, and won’t be able to trigger
- The better the device, the better. A newer iPhone/iPad will perform better than an old one
- Speed matters. Older devices may not support the most recent Wifi standards, and so may run slower, even if you have a fast Internet connection
Retailer Setup
For simplicity, we’ll configure Amazon, but we support Target, Best Buy, Walmart, Gamestop, several Amazon marketplaces (US, Canada, Germany, France, Spain, UK), and that’s just the beginning.

Manage Session
The first thing we need to do is set up your session. Tap “Manage Session”. This allows Inventory Bot to act at the speed of light on your behalf when a product becomes available.
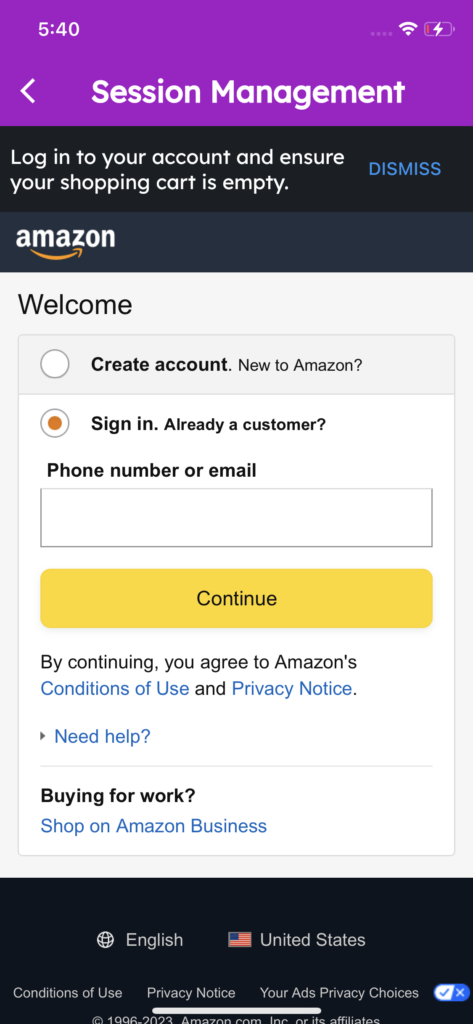
“Manage Session” is setup you should go through for every retailer you want to use with AutoBuy, since it will save you time when AutoBuy triggers. You want to make sure that your default (e.g. “One Click”) checkout options are set to the values you want. Make sure you verify payment methods, addresses, etc, as Inventory Bot uses your default settings when checking out.
Additional Settings
Once you’re signed in, you can get to work immediately. But you may want to configure things further. It’s important to note that none of your AutoBuy settings ever leave the device. It all stays secure on your device.
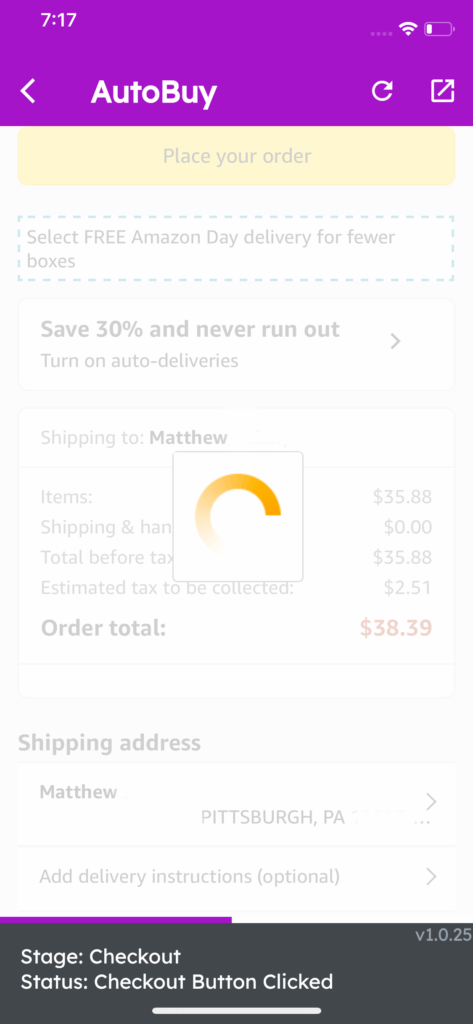
- Fully Automatic – This has the system click the “Place Order” button for you. You can turn this off if you want to test without submitting an actual order. Or you can just complete the order and cancel it afterwards.
- Credentials – If you enter your account Login/Password for a given retailer, the system will attempt to use them to log you in if your session ever expires.
- Payment information – Some sites will ask you to confirm your CVV number. You can enter this and the system will attempt to enter it during checkout.
- Other options – Different retailers have different options depending upon their specific checkout options.
Giving AutoBuy a Test Drive (Optional)
At this point you could just choose whatever products you want to track and call it a day. But if you want to give AutoBuy a test drive, continue reading. To do this, we can enable AutoBuy for an In Stock product. Maybe even something you were already going to buy!
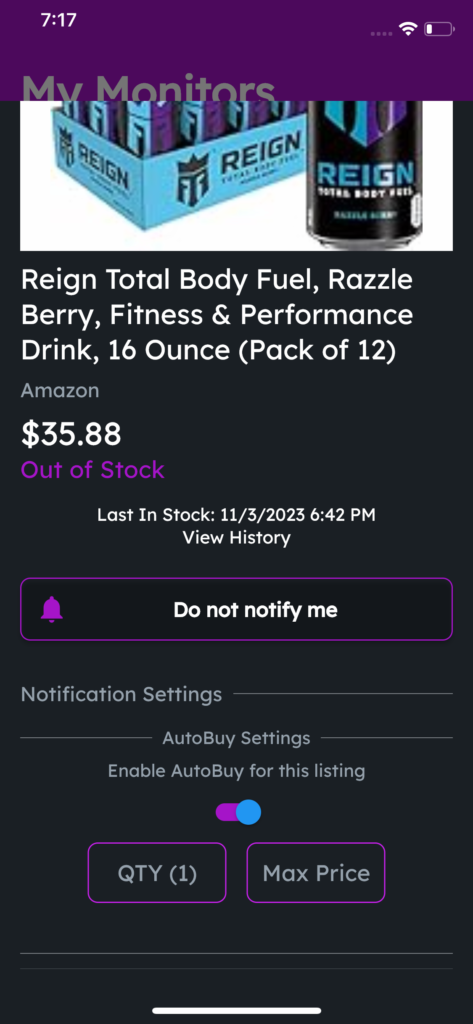
Tap “Enable AutoBuy for this listing”. This one tap will enable everything you need for this to “just work” (aside from Manage Session, which was done earlier). Soon, the notification will arrive, AutoBuy will start running, and you’ll be greeted by an Inventory Bot celebration!
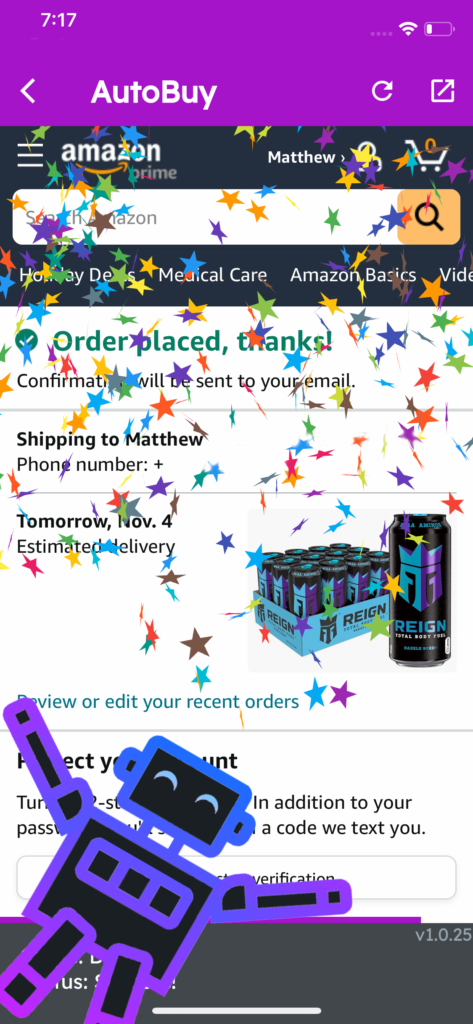
That’s it! You’re now set up to use the most powerful consumer checkout automation available.
Still not convinced? Check out our AutoBuy Wins channel on Discord to see what our users are getting!